Last Updated on November 22, 2020 by Rick Darlinton
To change windows language, you just follow the steps below which I have already tried to successfully change the language on my windows Toshiba laptop from Chinese to English. Just keep it in mind that sometimes you need to be patient if you find the language packs can’t be downloaded on your computer. If the language packs fail to be download, just try it for another time. Now let’s take a look at some detailed steps below about how to change windows system language.
How to change the system language in windows 10/7
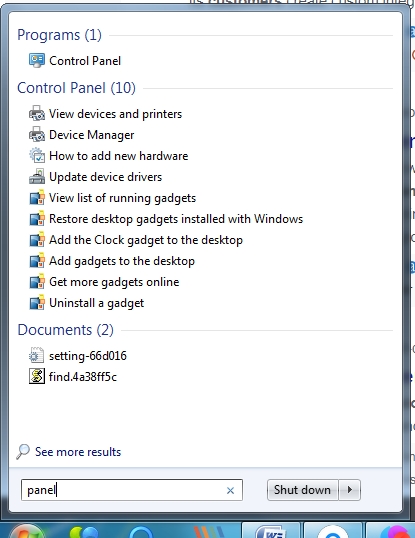
Step 1: Enter the “control panel” in windows
From the very beginning, just tap on the “Start” screen on your computer and then type the word “panel” in the search box to access the control panel setting.
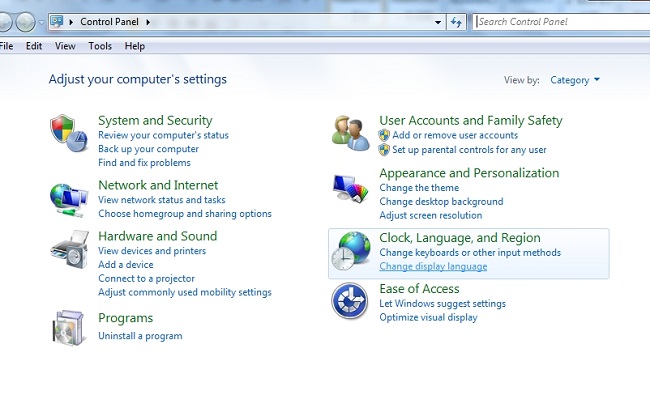
Step 2: Find the ‘Clock, Language and region” option
Now find the option “Clock, Language, and region” inside the control setting and subsequently click on the “ change display language” .
Step 3: Change the system language in windows 10/7
To change the windows system language , you need to select the “Formats” and choose the desired language under the format. For example, select the “English (United States)” if you want to change the windows system language to English.
After that, also tap on the “Location” and choose a country where the desired language is spoken locally. Similarly, just find the “United States” or other English-speaking countries like United Kingdom.
Next, tap on “ change keyboards language” and choose your desired language in the setting under the “Keyboards and languages” option. After this is done, the following step is very critical which can decide whether you can successfully change the system language in windows 10 or 7. To change the windows language, select the language you want to show on your computer under the option “Choose a display language” if the language already exists on your computer. Do not forget to tap on the “Apply” button after everything is done. For showing the system language successfully, restart your computer and you will find the selected display language will show normally when your computer starts.

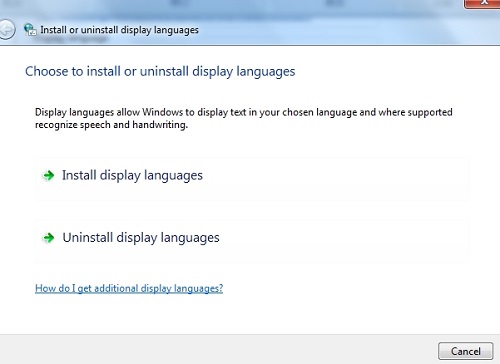
Step 4: Download the language packs if the selected language does not exist
But most of times, you may find the language you want to show does not exist on your computer. If this is the case, what you need to do is download the language packs on your PC. To download the language packs, just select the “Install/uninstall the languages” option under the “Keyboards and Languages” and then go to “install display languages”>”launch windows update”.
Next, tap on “ check updates” in the interface. It may take some time to find the language updates and you may find the windows updates can’t be found for many times, which is why I ever failed to change the system language on my windows 7 computer. But when I tried to check the windows updates again for another day it worked so you just need to become patient and check the updates at different times if it can’t found. After windows update is processed successfully, just download the new updates, particularly the language packs you need. After this is done, the desired language will be displayed under the “Choose a display language” .
So these are the detailed steps you can try to change the display language in windows successfully. In general, It is easy to be done but you just need to be patient and try it for many times if the language packs can’t be downloaded on your computer.