Last Updated on July 21, 2023 by Rick Darlinton
Pretty ugly things could happen to Windows 10 at times, right? Whether it’s an attack or disk corruption, it could lead to serious data damage or loss. One of the best ways to reduce the effects of such unwanted events would be to back up data in Windows . The backed-up data would definitely come in handy in cases whereby you inadvertently deleted some useful data or lose them due to unknown reasons or as a result of a corrupted disk. You’re in luck, because before you is a simple yet informative guide on how to backup data in Windows 10.
The steps for using various system backup tools such as Windows’ native tool (no installation required) and other third-party tools will be explained and simplified right here. Alright then, let’s get to it!
There are various backup tools you can utilize on the Windows platform. Some have advantages over others, but they all get the job done. Your Windows device comes packaged with some cool, free backup utilities. If you’re looking for more diversification, there’s a handful of third-party backup software out there that you can use to backup data in Windows 10
1. Backup Data in Windows 10 with File History
File History (FileHistory.exe) is a built-in tool on Windows that saves copies of your files on external or secondary drives. The saved copies can easily be restored in cases of lost or damaged files. Here’s a brief look at where to find the File History utility and how to use it.
Please make sure you have an external or secondary drive available-or at least a DVD or a network location-because your data can only be backed up into a secondary drive (Flash or external drives, DVDs, network location).
1. Click the “Start” menu icon and next, the “Settings” icon at the bottom-left corner of the menu.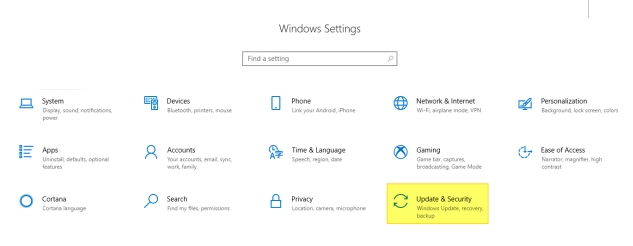
2. Find and click “Update & Security”, and then click “Backup” on the next screen.
3. Click on the “Add a drive” option and select a drive from the list of connected devices. You can also back up to a network location if available.
2. Use File History for Backup (Steps)
On Windows 10, the “File history” utility is located under “Update and Security”, the same place we set up the backup drive in the previous section.
1. From the Windows start menu, click on the “Settings” icon found at the bottom-left corner of the menu.
2. Select “Update & security” and then select “Backup”.
3. Click on “More options”. Next, “Add a folder”. The folders to add are those you want to backup. Folders can easily be added or removed, so be aware of that. Added folders are found in “Backup these folders list”/ If you want to remove a folder, simply select it from the list and click “Remove”.
Also read: Some mac backup software you can try
3. System Image Backup
A system image backup is a full snapshot of your computer’s internal drive, a full backup of your drive, but the image will be saved in an external drive. After carrying out this task successfully, you’ll be able to restore the system image to your device the way it was before the image backup.
However, It is important to note that you can’t restore this image to another device. It is particularly meant for computer hardware that created the system image. You shouldn’t try restoring the image to another computer.
Now, follow these simplified steps to create a system backup image for your Windows 10 device:
Step 1: Launch the backup and recovery tool.
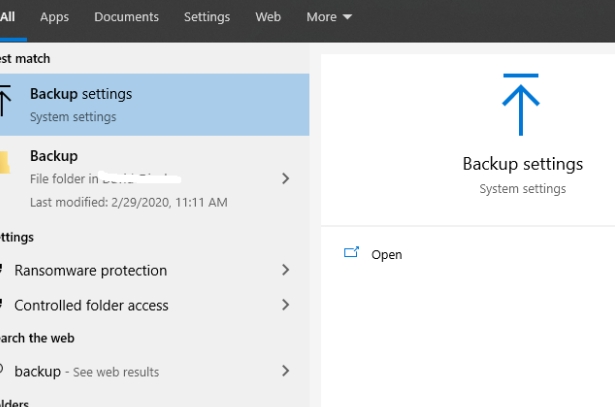
Click the “Start” menu icon and type “backup” into the search bar and then select the result. Then click on “Create a system image” inthe Backup and Restore(Windows 7)
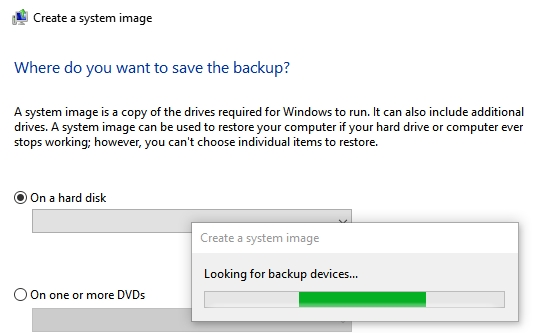
Step 2: Create your system image for backup
The backup tool will scan your device for all DVDs, network locations, and external drives connected to it. From the list of external drives/locations, simply select the one you want to save your backup to.
Have you decided on where to save your system image? Good. Simply hit “Next” to proceed. The size of the system image alongside other details will be revealed to you. If necessary, go back and make changes. Windows will only back up your system drive by default. However, you can bundle up other drives and back them up too. To be frank, creating separate backups for different drives is a better option. Click the “Start Backup” button as soon as you’re done.
The time taken for the system image backup depends on the type of storage device receiving the backup data, the drive being backed up and also your PC. For average PCs, it might take an hour per 150gb of data or so.
Step 3: Create a System Repair Disk
On completion of the system image backup, the option to create a system repair disk will be made available. To prevent headaches in cases where you replaced your drive and can’t start windows up, the System Repair Disk could be used to start-up your PC and restore your system image properly. That’s why it is recommended that you create this repair disk.
To create the system repair disk, simply select a drive and hit “Create Disk”. The repair disk will be created in the selected drive. This way, things will be easier whenever you wish to restore your system image.
4. Some Software tools you can use to backup data in Windows
As mentioned earlier, several third-party backup software for windows 10 that exist on the Windows platform. This is a brief review a few of them.
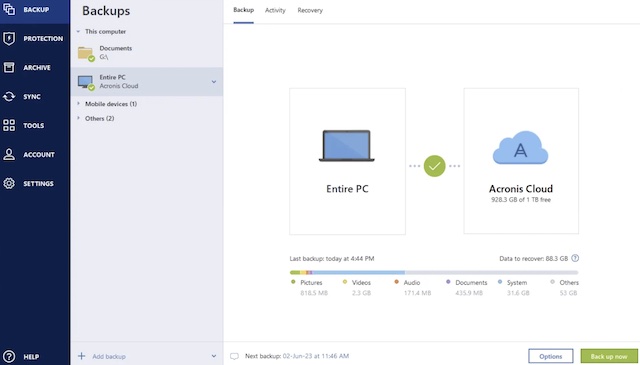
Acronis True Image
This is a disk cloning software that’s a favorite of many a user. With Acronis True Image, you can clone an entire disk. Acronis supports “Active cloning”, which means you might not need to reboot your system before completing the cloning task. However, only cloning of an entire disk is supported. You can’t simply clone parts of your drive.
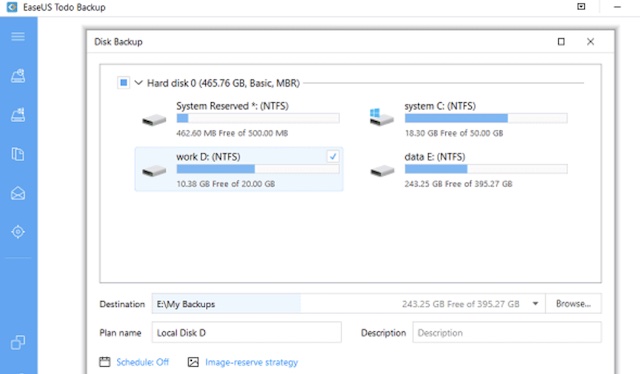
Easeus Todo Backup
Here’s another backup solution. With Easeus, you could easily protect your data by running manual or automated backups. Easeus is also capable of cloning your system (system image). More information can be found at the tool’s official website. The system backup on Easeus is to be sent to an external drive as usual.
Backing Up to The Cloud
Backing up local files to a cloud server is increasingly becoming popular across operating systems. Backing up data to the cloud simply means storing your data to online instead of on hardware like hard drives. This backup method is arguably the most convenient because you need not worry about the safety or security of a physical device holding your data.
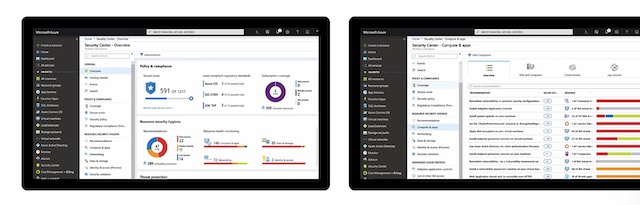
You could use various third-party software or Azure from Microsoft to back up your data online-or the cloud, as it is more popularly known. To back up your local files using Microsoft’s cloud service (Azure) on your Windows 10 machine, simply follow the steps outlined below.
- Set up your Microsoft or Azure account
- In the search box, type “Microsoft Azure Backup” and click the top result. Click the “Action” menu as soon as it opens.
- Select “Schedule Backup” and click “Next.”
- Click the “Add items” button and select the files and folder that you want to store in the cloud and click “OK.”
Note: Exclusion Settings button to remove items within a selected folder with certain contents you do not wish to backup.
- Click the “Next” button, then click “OK”.
- Select the schedule for the backup and also the times when you want the backup to run.
- Click the “Next” button to continue.
- Review or allow the automatic backup option to be executed over the network. The “Offline Backup” option makes copies of your local files, and you can send them to Azure at will.
- Click “Next”.
- Finally, click “Finish” to complete the process
NAS Backup
Network-attached Storage is a dedicated file storage system. Multiple users and clients can send/retrieve data from a centralized disk capacity. NAS devices support tasks such as backup and archiving. Synology NAS will be used in this article.
To use the Synology NAS, you need to add the NAS as a virtual drive within the Windows File Manager first: Its installation should take only a few minutes. After setting up the Synology NAS, you just need to follow these steps:
1. Click the “Windows” menu icon and type “backup” into the search bar.
2. Next, select “Backup settings” and then “More options.”
3. Select “See advanced settings”, then “Add network location.”
4. Create or pick a folder on the network drive and select it (click “Select folder”).
5. For the last step, hit “OK” to complete the task.
Conclusion
Computer vulnerability and attack are arguably on the increase; hence the need to backup your important files. Data is almost everything in this digital era. From memories shared with friends and family in the form pictures and videos to important work files and projects are stored in computers or storage devices, data’s always an important part of life.
This article covers the important details and steps necessary for backing up your files using Windows’ built-in tools. Third-party tools such as Acronis True Image 2018, Easeus and Synology NAS were also introduced. In the end, it’s all up to you to decide which of these tools to use. Either way, you’ll definitely get the desired results. Hope you found this little piece helpful and informative!
Related Posts: