Last Updated on July 23, 2023 by Rick Darlinton
There’s are times when you have to record your computer screen so your audience can follow your procedures to achieve the desired result. While there are several screen recording apps, OBS Studio is one of the best free screen recorder for pc.
With the OBS Studio, you can show your gaming prowess to interested viewers, record your offline & online activities, and more. But you still have to learn the ropes. And that’s where this guide comes in handy.
In this piece, you’ll learn to record your PC screen for free with OBS free desktop recording software as well as other features of the computer software.
How to record computer screen for free OBS
To record your computer PC screen using the OBS studio, here are steps to take:
Step 1: Install the OBS software
Download and install the OBS studio. You must include all plugins as this allows the software to function optimally. When the installation process is completed, the app starts automatically.
Step 2: Choose your preferences
The OBS studio has a host of settings that allows you to create the right visual. For instance, you can edit the preset video resolution so it matches your requirements.
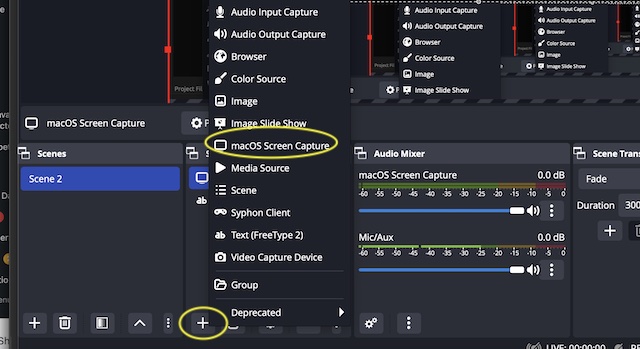
Step 3: Add source
The OBS studio operates as a collection of scenes, and each is obtained through sources like the webcam, microphone, and more. To proceed with a screen recording event, click the plus (+) sign on the source tab, and select ‘display capture if you want to record computer screen.’ If you want a video of you on the screen, the webcam source can be included as well.
Step 4: Recording
After selecting ‘display capture,’ you’ll need to pick the display to record.
This is particularly applicable if there are multiple monitors to be captured on your screen. Once confirmed, click the ‘OK’ button.
Return to the sources panel, and click on ‘video capture device’ to select the device you’d prefer to use for the capturing, which could be your PC’s webcam or any attached device similar in function.
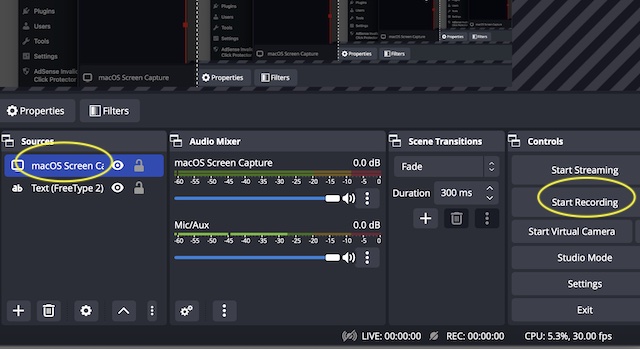
If done correctly, the desired image appears on your screen. The image’s size and position can be adjusted accordingly.
Afterward, click the start recording button visible at the bottom right of the app. halting the recording process is as easy as hitting the stop recording button.
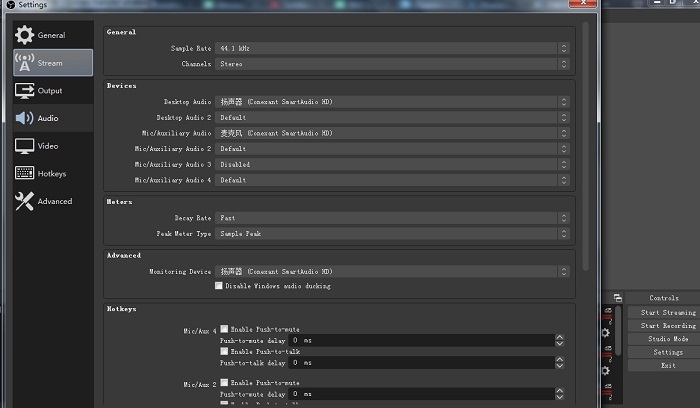
Note: You can also tap on “Settings” in the interface and then go to “output” to select a path to keep the recorded video. Also remember to set recording format as “MKV” as if you choose “MP4” here, the program may crash during recording. But you can select “advanced” option and click on “automatically remux to mp4” so that the recorded video can also be saved as mo4 videos.
Features of the OBS Studio
Simplified control panel
The OBS app has an interface that makes usable settings easily accessible. You can navigate the panel of options available on the app as quickly as you like.
Impressive video capture
While the OBS studio is a free desktop recorder, it doesn’t underwhelm in the quality of video capture. This is seen in the frames per second (fps) options available for selection, which improves the chances of tweaking the app in your favor.
Diverse settings
It’s not often that you see a free app that’s quite pliable, but this is the situation with the OBS studio software. You can tweak how the app records your PC screen, ensuring you get the desired outcome.
Video streaming capability
Besides its screen recording attribute, the OBS studio also allows you to stream videos. This way, you can easily incorporate your recorded scream into the visual.
Comes with a sensitive audio mixer
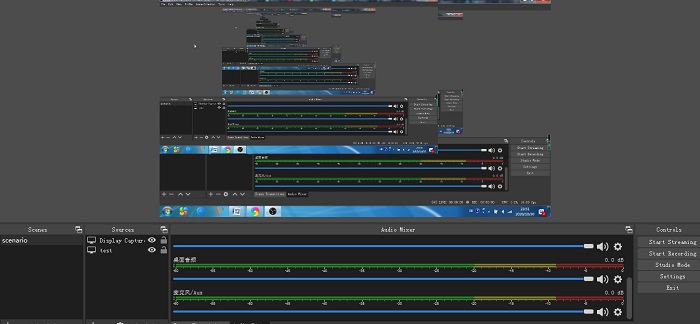
The OBS studio isn’t only famed for its visual capability as the program is equipped with an audio mixer, so you can manipulate the sound aspect of the video for the best result.
How To Fix OBS No Sound
Not sure of the integrity of your OBS audio setup? Follow the audio mix bars. If they move in green color, the software is ready to deliver the sound you seek. Here are steps to take in resolving a ‘no sound’ problem with your OBS software:
Use the settings available on the audio mix
If a video playing on the monitor lacks sound output, then select the settings beside the audio bars.
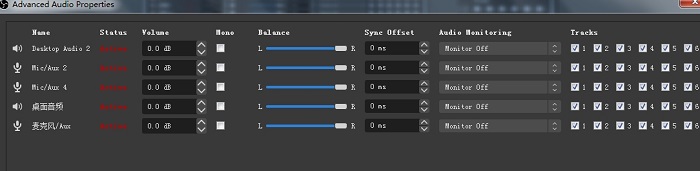
Then click on advanced audio properties. Find the media source row and change the selection from ‘monitor off’ to ‘monitor and output’.
Restore to default
If adjusting the monitor off to monitor and output doesn’t fix the issue, you can change the audio settings by going to settings>audio>devices and then set the devices to “default”
Close the OBS program and run it
This could help fix the OBS audio or sound not working most of times by by closing the OBS program and restart it again.
How to Edit Your Recorded Video
Videos recorded using the OBS studio app aren’t expected to be perfect. You might have to edit them or make some additions to the initial recordings if they’re to meet the expectations of your viewers. Unfortunately, the OBS studio apps multifunctional capacity doesn’t extend into video editing, so a third-party app might be necessary.
You don’t have to spend a dime editing the OBS recorded video as the Lightworks free video editor is up to the task. Here are the steps to follow:
Step 1: Create a project
Select the ‘create new project’ tab and submit the details of the OBS recorded video in the relevant spaces provided.
Step 2: Import the recorded video
Use the local files tab to locate your OBS recorded video. The Lightworks app has different file import methods so use the most convenient to add the recorded video.
The conventional drag and drop should suffice in Transferring the video from the media panel to the timeline section.
You must confirm the resolution of the file matches the current frame rate setting in the Lightworks app, else an error message is returned by the software.
Step 3: Edit the recorded video
Use the edit tab to get your video ready for editing. With the cursor, trim, or split the video as you deem fit using the range of tools available.
You can also introduce videos and audios into the recorded video to spice it up.
Step 4: Export
When you’re done editing the video, retrieving the edited file is as easy as selecting your preferred format and exporting the video. If you’re using the free version of the Lightworks editing app, you are limited to just MPEG4/H.264 file formats. To access the full range of format options, you’ll have to pay for the app.
The OBS studio is extremely versatile, and it’s not difficult to master. With free desktop recording software, you can guide your audience right with audio instructions in the background.
While the OBS studio isn’t equipped with the capacity to edit videos, apps like the light works free video editor can prove quite helpful in the interim.