Last Updated on December 24, 2020 by Rick Darlinton
There are so many times when we need to take a screenshot on windows no matter it is a part of the screen or the entire full screen. For example, when you want to share some important data from an excel file, it will be more convenient to capture part of screen on windows to your colleagues. Or sometimes, you just want to take a screenshot of a specific picture on your computer screen. Regardless of the motives, in this post, we will guide you about how to take a screenshot on windows including capturing part of the screen, getting scrolling window screen as well as capturing the full screen on windows.
Part 1: how to capture part of screen on windows with PicPick
PickPick is one of the best screenshot software for windows. With PicPick screenshot, you are able to take part of screenshot on windows PC and also capture the full screen or the scrolling window.
You can follow the steps about how to take a screenshot on windows with PicPick
Step 1: Download and run the PicPick software on your windows PC
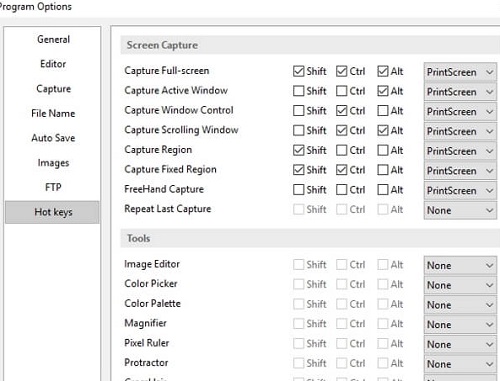
Step 2: Select the “File” option and then tap on “Options”. Then, you could change the settings such as automatically saving the screenshot images to a place on your computer or changing the screenshot image quality. But most importantly, the hotkeys are available to take a screenshot on windows more conveniently. For example, you could select the “Capture Region” option and create a hotkey of Alt+ 1 to capture part of the screen on windows. For taking a full-screen screenshot on your computer, just select the “ Capture full-screen” option and create a hotkey. PickPick also lets you capture scrolling window, capture window control, and capture the active window, etc.
The PicPick screenshot software is very easy to use and it is also free to use. This is why I have used this program for many years. Another highlight is that the program is very lightweight to download so it doesn’t consume lots of space on my computer. What’s I am also impressed by the program is that it provides many other screenshot editing options. For example, there are many effects that could be applied to the screenshot and you can add highlight rectangle, texts, shapes, stamps to the screenshot image. With these photo editing features, you do not need to edit the photo again in Photoshop.
Part 2: How to capture scrolling window
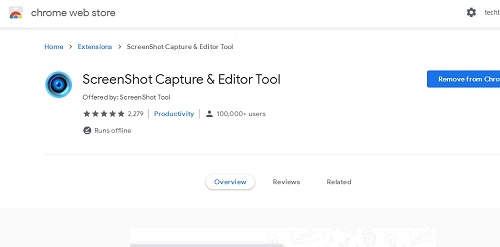
There are many tools you can use to capture scrolling window. The PicPick software I just mentioned above is able to capture a scrolling window. But I will focus on introducing some Google screen capture extensions here. If you want to take a scrolling screenshot on Windows, just visit Chrome Web Store and search for “Screen capture” programs. You may find the ‘ScreenShot Capture & Editor’ program from the list of options. When you see this extension, just tap on the “Add to Chrome” option and then the extension icon will show in the Chrome menu bar. To capture scrolling window screen, what you need to do is click on the icon then wait patiently until the screen capture is complete.
It’s also possible to use other screen capture extensions in Chrome so just try them one by one until you get the best one.
Part 3: How to capture full screen on windows
When it comes to capturing full screenshot on windows, it’s possible to use the Alt+Print screen hot key on your keyboard. But it’s much easier to press the “print Screen” key on your keyboard to take full screenshot on your computer. Another solution that’s available for full screenshot capture on windows is to access the snipping tool by clicking the Start button or just pressing the Windows key.