Last Updated on July 21, 2023 by Rick Darlinton
Before you build a website, you may think it is very hard if you do not have technical skills. But actually, nowadays there are lots of third-party platforms where you can build a website very easily. WordPress is one of the most popular website builders around the world. WordPress is particularly suitable for blog website. If you ask me why I select WordPress to build a website. I will tell you that WordPress is very Seo-friendly and it is very easy to build a website using WordPress. In this article, we are going to introduce some detailed step-to-step guides on how to build a WordPress website.
How to build a WordPress website
Before you want to build a website using WordPress, you need to own a domain name and also there are other things that need to be done. For example, you need to find a reliable and quality website hosting platform and more. Now let’s get started on how to build a WordPress website.
1. Select a hosting provider.
Before you build a website, you need to own a domain name and also choose a reliable hosting provider. Usually, you can buy domain name and select a web hosting provider from the same company. Some of the best web hosting providers include Bluehost, Godaddy, and more. As I used the Bluehost to host my website, we will introduce how to make a wordpress website using Bluehost web hosting provider.
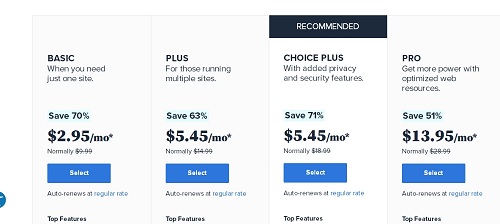
Just navigate to Bluehost website and sign up with an account. You can create a Bluehost account using your email. Please note this email will connect with your account and you will need to log into Bluehost using it. After that you can select a web hosting plan. There are three types of web hosting plans offered by Bluehost: Shared hosting, VPS hosting and dedicated hosting. For beginners, you can select a shared hosting plan if your website daily traffic is less than 2500 users.
2. Select A Domain Name
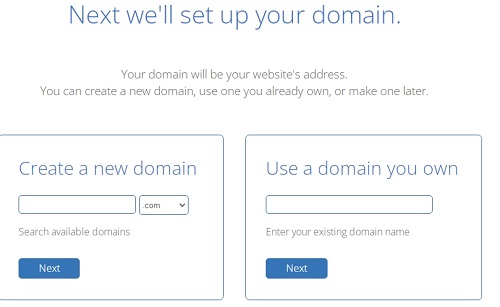
After selecting a web hosting, you will need to create a domain or type your existing domain name. If you do not have a domain name, just enter a new domain name and click on Next button. If the domain name is available, then you can continue to fill in the payment information and account information.
3. Install the WordPress
After making a payment, you will receive the details about the domain name and web hosting plan. Just log into the Bluehost using your email and password.
After logging into Bluehost admin dashboard, you will be redirected to install the WordPress. It may take a few minutes so just wait patiently.
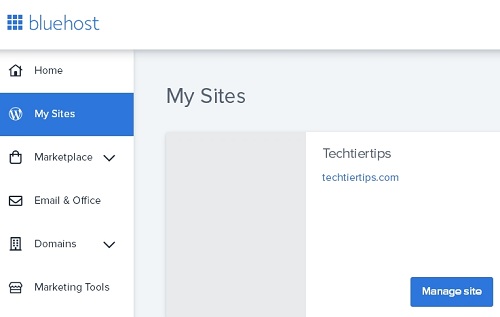
After installing the wordpress, you can tap on My sites from the left bar and then click on Manage site if your domain name exists in the interface.
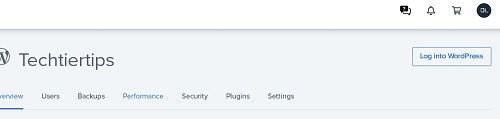
If you want to manage your website from WordPress dashboard, you can click on the option called Log Into WordPress as shown below.
4. Select a WordPress theme
After entering the WordPress dashboard, you need to select a WordPress theme. There are a huge selection of WordPress themes. Some of them are free while others may need to be paid for more features.
To select a wordpress theme, go to Appearance and then select theme from the left side bar. After that, you will be able to select a wide range of wordpress themes. You can enter some keywords in the search box to find themes easily. For example, if you want to build a WordPress blog site, just type the keyword Blog and check some themes suitable for wordpress blog site.
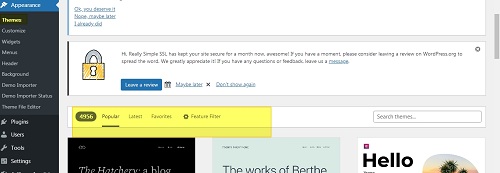
To learn more details about a WordPress theme, just select the theme and then click on details & preview. After finding a perfect wordpress theme, just click on the Install button and continue to tap on Activate to use the theme on your wordpress site.
Note: No matter if you choose a free theme or a paid wordpress theme, you could select to import the theme following the instructions below. Sometimes, you may also need to install the theme demo importer plugin provided by theme developer for importing some paid wordpress themes so that you can set up the theme in one click.
- Download the theme file from the theme demo website.
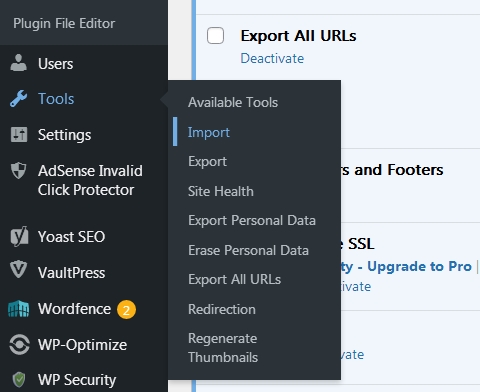
- Now navigate to Tools from the lest side and then select Import.
- You could now choose to import your theme and install & activate it.
5. Install wordpress plugins
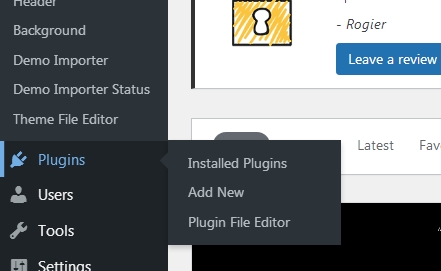
WordPress provides you with so different Plugins to optimize your website. You can install some useful wordpress plugins. Here are some WordPress plugins we recommend as shown below. To install a plugin, just click on Plugins on the left side bar and then select Add new button.
- Classic editor-This is one of the best blog page editors that is free to use.
- Insert headers and footers- You can use this plugin to add some code such as Google analytics or google tag manager verification codes in the head part of your site’s source code.
- Redirection-It is free to use for 301 redirection
- Yoast Seo- A powerful and free SEO tool for meta title and description optimization and more features.
- Explore all URLs- you can export the URLs and titles of all blogs from your website.
6. Create categories and a navigation Menu
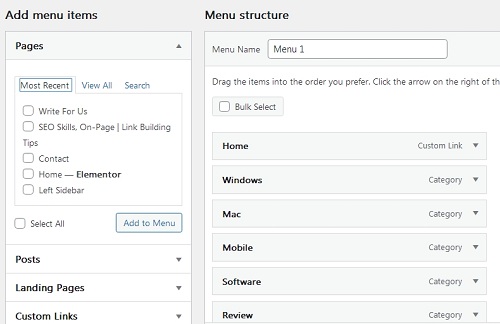
After installing some necessary Plugins, you can create some categories and also create a menu for your wordpress website. To create categories, just tap on the Posts on the left sidebar and then select categories. Subsequently, you could create categories. After that, the next step is to create a menu by clicking on the Appearance option from the left sidebar and choosing Menus option. Just select the categories or pages on the left side to add them to the Menu list.
7. Create your First wordpress blog
After everything is done as mentioned above, now you could begin to create your first wordpress blog. Just click on the Posts option and then tap on Add new to create a wordpress blog.
8. Make your wordpress site live
When everything is done perfectly, you can now choose to make your wordpress site live. To publish the wordpress site, you can log into your Bluehost web hosting admin and click on Launch the website to make it go live.
So these are the detailed step-to-step tutorials about how to build a wordpress website and if you have any questions, you could leave your comments below to let us know.
Related Articles