Last Updated on August 27, 2023 by Rick Darlinton
There are times when you have to capture what’s happening on the screen of your Mac computer. Knowledge of how to record your screen on Mac can make all the difference in such situations. Fortunately, screen capture isn’t a luxury on Apple’s devices, including the Mac.
When you use the built-in app – Quickplayer or Screenshot – on your Mac computer to record your screen, it might not capture the internal audio, but the external sound is recorded well.
The app used to record your Mac screen depends on the operating system of the computer. For older MacOS, QuickTime Player should do just fine. For Mac computers running either Mojave and Catalina, Screenshot is the screen-recording app to beat. But there are other viable alternatives to these preinstalled apps.
3 Ways to record your screen on mac
Here, we intend to look at how to record your screen on Mac using these screen recording software programs.
Mac screenshot toolbar
When it comes to how to record your screen on mac, you can try to use the mac screenshot toolbar which is quick, convenient and user-friendly. Follow the tips below about how to record your screen on a mac.
firstly, press command +shift+5 to open the mac screenshot toolbar as shown below.
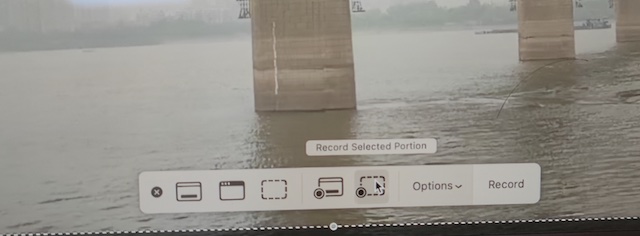
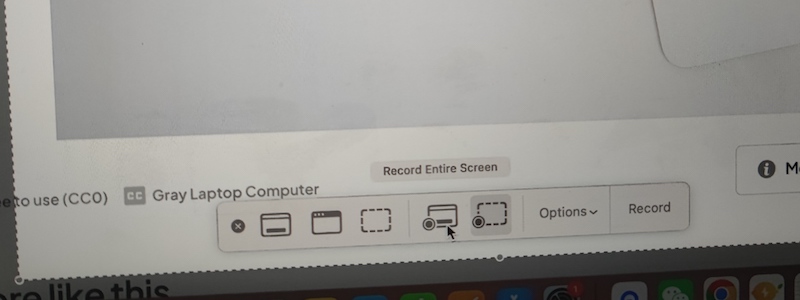 Next, move the mouse to the icons called record entire screen or record selected portion.
After that, tap record button to start recording screen on your mac.
To stop the screen recording, just press command +shift+5 again and then tap stop button to stop the recording process.
QuickTime Player
The QuickTime Player application is more than just video playback functions. On Mac, you can use the software to capture the screen of your computer, especially for older versions of the macOS. To do this, follow the steps below:
Step 1: Run the QuickTime Player application
Step 2: Select the ‘File‘ tab from the application’s top menu. Click the ‘New Screen Recording‘ option on the drop-down list. There’s also the option of picking this option when you right-clicking the QuickTime Player app, but this only works if the program is in the dock mode.

Step 3: now, the mac screenshot toolbar will pop up. To record screen on mac, just select the buttons called record selected portion or record entire screen depending on your requirements.
Step 4: Start the screen recording process by using the record button. The stop button is less conspicuous as you have to use the file menu option to find it or just use the combination ‘Command’ + ‘Control’ + ‘ESC’ to halt the recording process.
Step 7: On halting the screen recording process, you can view or edit the recorded visual on the QuickTime Player application.
Open Broadcaster Software (OBS)
OBS doubles as both a video editing software and a screen recording app. Since the program is compatible with macOS, Windows, and Linux, it can be used to record your screen on mac .Below are the steps to follow:
Step 1: Install OBS studio
As the cross-platform application isn’t preinstalled on your Mac computer, it has to be downloaded and installed using the OBS project link.
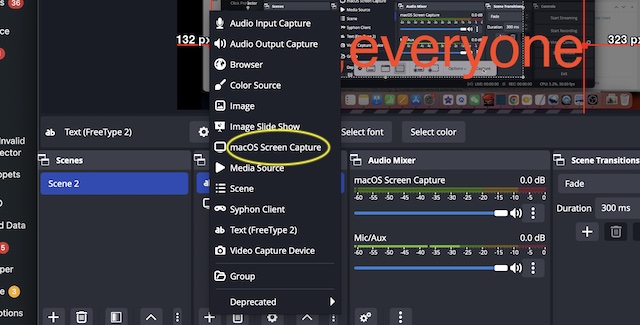
Step 2: Add a video source to the OBS studio app. This is achieved by selecting the ‘+’ button from the Sources panel. Then select ‘macOS screen Capture’ from the options provided and click ‘OK’ to affirm your selection.
Step 3: Check the screen dimensions covered by the OBS studio to ensure it meets your expectations.
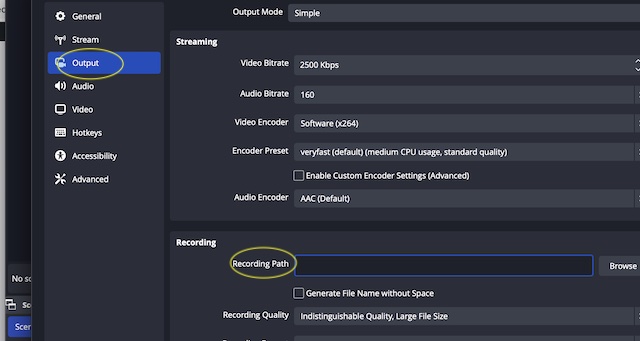
Step 4: Select the storage destination of your screen recorded video by clicking the ‘Settings‘ tab visible on the control panel of the OBS studio. Click the ‘Output’ tab and proceed to edit the ‘Recording Path‘ field to wherever you want the recorded video stored.
Step 5: To commence recording of the screen, click the ‘Start Recording‘ tab, which is on the right side of the control panel.
Step 6: Once the desired screen footage has been captured, you can stop recording by using the ‘Stop Recording’ tab. Afterward, find the recorded video in your Mac computer from the chosen storage destination entered on Recording Path’ field.
How To Edit The Recorded Video On Mac
After recording the screen of your Mac computer, you might need to edit the footage if it’s to meet the needs of your viewers. This is plausible using a video editing tool.
If you don’t have the budget to splash on high-end editing applications, there are many video editors for Mac that should do just fine. Below are some of these applications:
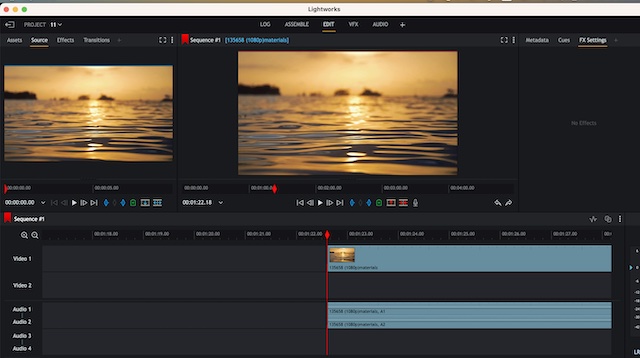
Lightworks
Lightworks is a video editing software that has a basic setup available for free. With the free version, you can add effects to your recorded video, export it to several video-sharing platforms, and more.
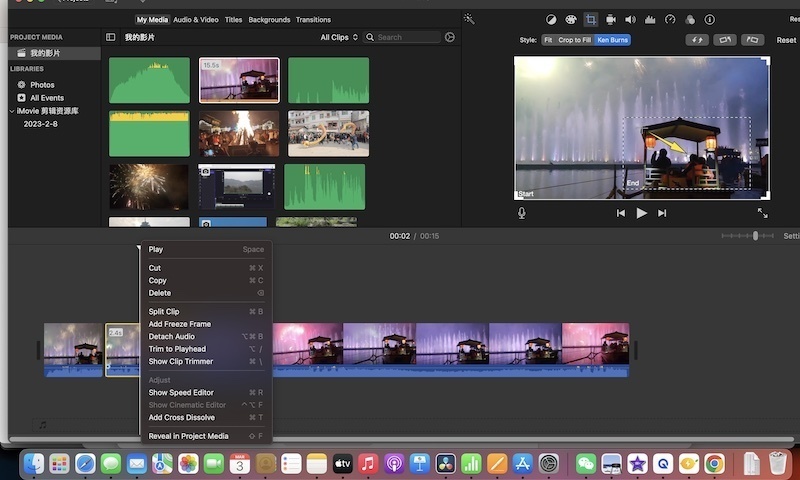
iMovie
iMovie is one of the best free mac video editing software for mac. if you want to cut or trim the recorded video on mac, iMovie is one of your best options as it supports 4k video editing and it is completely free to use.
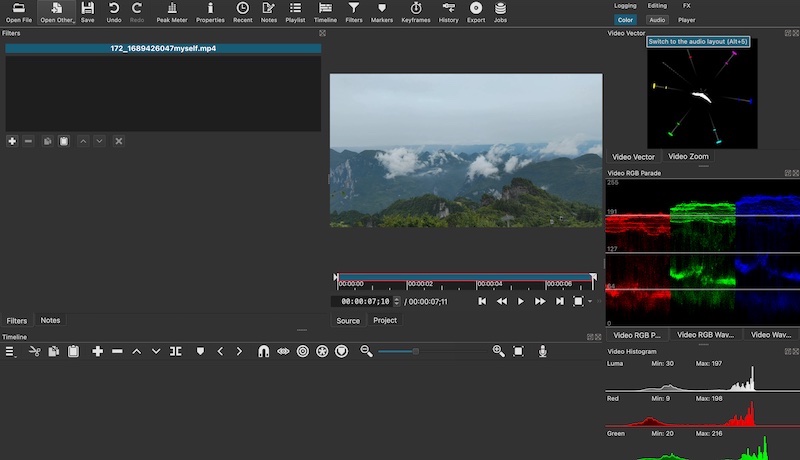
Shotcut
To edit your screen recorded video, Shotcut video editor is another free software to consider. The non-linear video editing application is capable of handling files in multiple formats. You can use blends, filters, and several effects on your recorded video using the Shotcut program.