Last Updated on January 2, 2024 by Rick Darlinton
Premiere Pro is one of the best video editing software for both professionals and beginners. It has abundant advanced video editing functions that help you create professional videos. When you edit a video, you may need to freeze frame. For example, when you introduce software in a video and speak something, you may want to freeze frame before you show the tutorials. If you are using Premiere Pro and do not know how to freeze Frame in Premiere Pro, you come to the right place. Now let’s get started!
How to freeze frame in Premiere Pro by inserting frame hold segment
It is easy to freeze a frame in Premiere Pro by inserting Frame hold segment. This method is user-friendly and lets you add a freeze frame behind a video clip. You are able to extend the period of the frame. Follow the steps below about how to freeze frame in Premiere Pro by inserting frame hold segment.
- Download and run the Premiere Pro on your windows or Mac.
- Next, go to file at the top bar and then click on import button to upload the video you want to freeze frame.
- Drag the video to the Premiere Pro timeline.
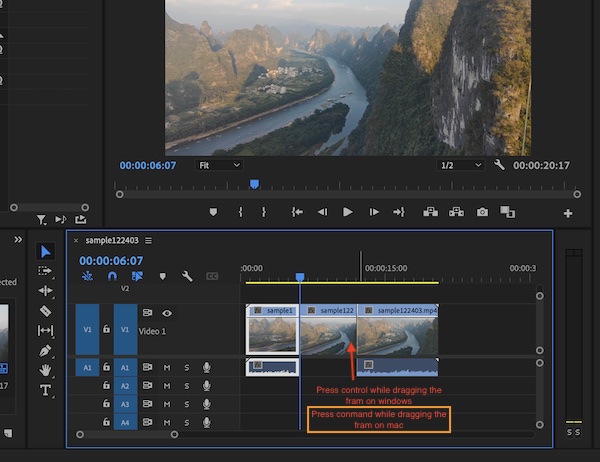
- Move the playhead bar to the place where you want to freeze frame. Then right-click the mouse and select insert frame hold segment.

- Next press the control key while dragging the frame hold segment to the place where you want to freeze frame if you are using windows pc. If you are using a Mac device, pressing the command key while dragging the frame hold segment to the proper place.
As you can see, it is very easy to freeze frame in Premiere Pro.
How to freeze frame in Premiere Pro by adding frame hold
This is the second method you can try to freeze frame in Premiere Pro. I prefer to use this method as it is more convenient and freezes the rest of the video clip. When you choose to add a frame hold, the rest of the video clip will be paused. So, it is very easier to freeze frame in Premiere Pro. Just follow the tips below about how to freeze frame in Premiere Pro by adding frame hold.
- Similarly, download and run the Premiere Pro on your device.
- Add the video to the Premiere Pro timeline.
- To add frame hold in Premiere Pro, move the playhead bar to the area where you want to freeze frame. Then, right-click the mouse and select add frame hold.
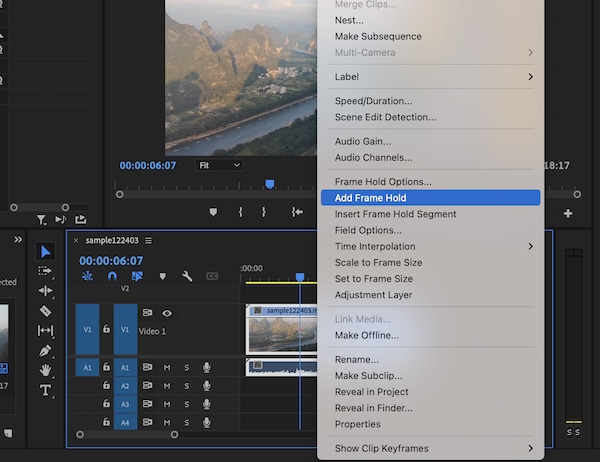
- Now, the rest of the video clip will be paused.
To sum up, this method is easier to freeze frame in Premiere Pro as you do not need to extend the frame period.
How to freeze frame in Premiere Pro by inserting a frame image
Sometimes, when you introduce something in a video, you may want to show an image and make sure it is still. If this is the case, you can try Premiere Pro to export the frame image and then insert the image into the video.
- Download and run the Premiere Pro on your windows or Mac device.
- Now, drag the video to the timeline.
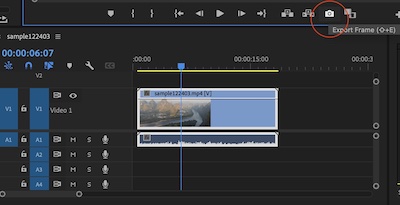
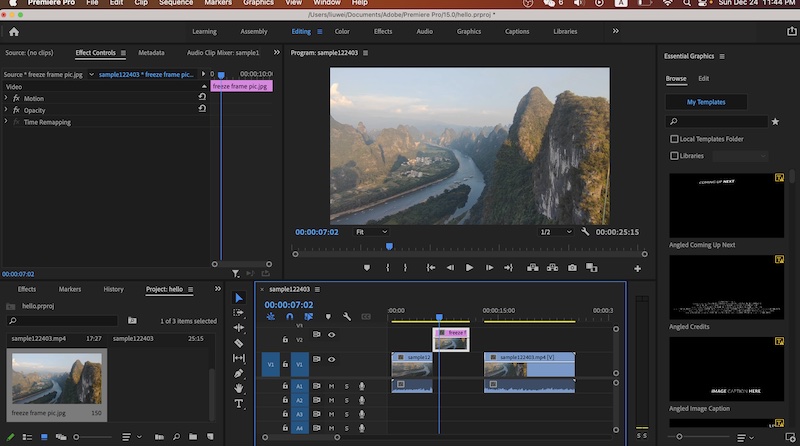
- Move the playhead bar to the place where you want to export the frame image and then select export frame below the preview window as shown below.
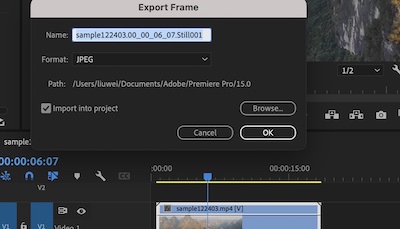
- Next, select the image format as jpg and also check the option of import into project.
- Next, add the export frame image to the place where you want to freeze frame and then also drag the video clip to the ideal place.
Freeze a frame in Premiere Pro using time remapping
The last method we will introduce about how to freeze frame in Premiere Pro is to use its time remapping tool. With time remapping, you can slow down the frame of a video in Premiere Pro and also choose to extend the period of the frame. Now follow the tips below.
- Open the Premiere Pro and add the video to the timeline.
- Move the playhead bar to the place where you want to freeze the frame.
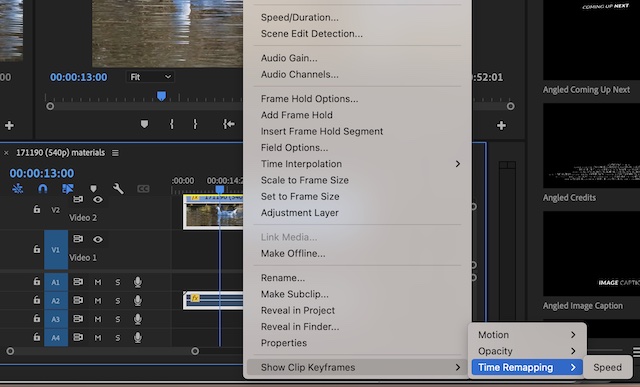
- Next, right-click the mouse and navigate to show key frames>time remapping>speed.
- Next, click on the white line in the middle of the video clip. Then drag the white line down to slow down the frame. For example, you can drag it to 1% so that the video clip is very slow.
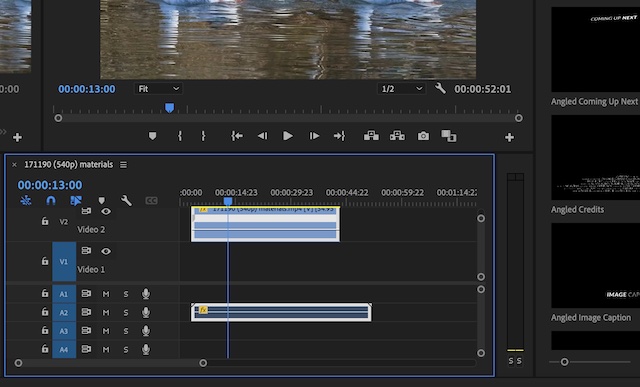
- You can also press the control key while dragging the frame to the ideal place on a windows pc. Or press the command key while dragging the frame to an ideal period on a Mac device.
Conclusion
So these are a total of 4 ways about how to freeze frame in Premiere Pro. All of these methods allow you to freeze any part or frame in a video. You can select your favorite method and begin to freeze any frame easily.