Last Updated on November 26, 2023 by Rick Darlinton
Premiere Pro is one of the best video editing software for windows and Mac that’s developed to create some professional videos. If you start to use Premiere Pro for the first time, you may wonder how to add transitions in Premiere Pro. Premiere Pro has varieties of transition effects that are helpful to make your videos look much better. The users also have the option to adjust the duration of transitions applied to the videos. Now let’s get started about how to add transitions in Premiere Pro step by step.
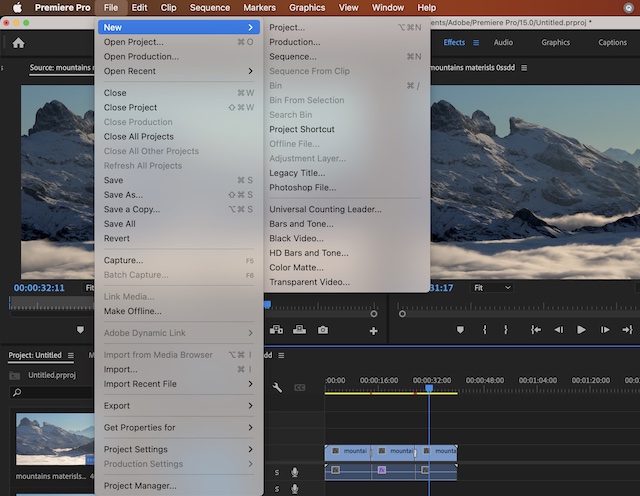
Create your project
First off, before you begin to add transitions in Premiere Pro, you will need to create a project or import the video to the Premiere Pro. To create a video project, just go to file in the header bar and then navigate to new>project to create a video project. Alternatively, you can also go to file> import to add the video to the Premiere Pro timeline.
Select the video or audio transitions in Premiere Pro
Next, after you drag the video to the timeline, you can begin to find the transitions in Premiere Pro. To locate the transitions, just click on effects in the top menu bar and then click on video transitions or audio transitions in the right sidebar. In addition, the users can type the transitions or the name of transitions in the search bar to locate the transitions quickly.
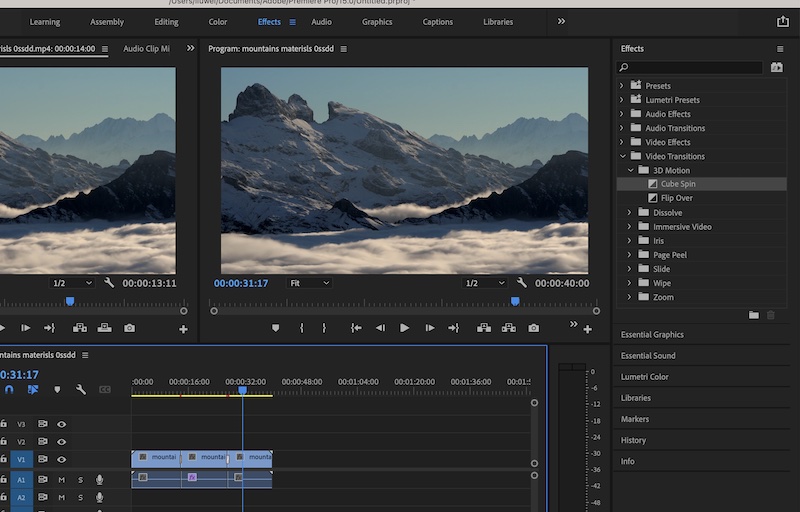
Premiere Pro provides a wide range of video transitions and audio transitions including 3d motion, dissolve, iris, slide, constant power and so on. Just try each of them and find your favorite ones.
Apply the transitions to the videos.
Subsequently, what you need to do is just select your favorite transitions and apply them to the video clips. But before you add transitions, you may need to split the video clips so that you can apply transitions between 2 video clips. To split a video in premiere pro, just drag the playhead bar to the place where you want to cut the videos and then press Ctrl+k (for windows) or command+k (for man).
Next, drag the transitions to the start of end of the video clip you want to add the transitions.
Adjust the transition durations and positions
when it comes to How to Add Transitions In Premiere Pro , please note you can also adjust the transitions durations and its positions in Premiere Pro. To do this, just click on the transition and then go to editing in the header menu bar. Next, click on effects control option. After that, you will be able to adjust the transition duration or change its position as center at cut, start at cut or end at cut.

Export the videos.
When everything is done properly, just move ahead and click on export icon in the top-right corner in Premiere Pro to export the videos to your computer.
Now we hope you understand how to add transitions in Premiere Pro. The process steps are listed above and you can follow them step by step.